Metallography Equipment Workflow Explained: Cutting, Mounting, Grinding, Polishing, and Etching

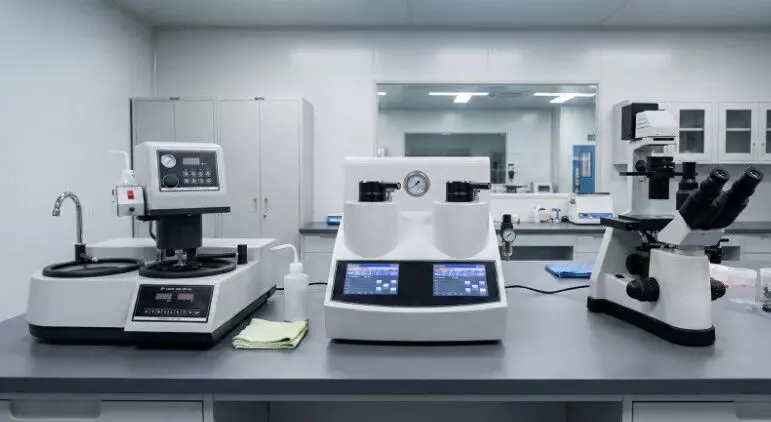
Metallography is the study of the physical structure and components of metals, typically performed through microscopic examination. To achieve accurate results, high-quality Metallography Equipment is essential, as the primary goal is to reveal a material's true microstructure without introducing external artifacts. The standard metallography equipment workflow follows five critical steps to ensure specimen integrity:
- Cutting (Sectioning): Removing a representative sample.
- Mounting: Encapsulating the sample for easier handling.
- Grinding: Flattening the surface and removing cutting damage.
- Polishing: Creating a mirror-like, scratch-free finish.
- Etching & Inspection: Highlighting microstructural features for analysis.
By utilizing specialized metallurgical equipment, labs can guarantee that the final data represents the actual material properties rather than defects introduced during the preparation process.
What Metallography Is and Why Sample Preparation Determines Result Quality
The accuracy of microstructure analysis depends entirely on the quality of metallographic sample preparation. If a sample is prepared poorly, features like grain boundaries, phases, and inclusions may be obscured or distorted.
The process must be repeatable and adhere to international standards such as ASTM E3. Any deviation in the preparation stages can lead to "false" structures, such as smearing or pull-out of brittle phases, which could result in incorrect material characterization or failed quality control (QC) reports.
Cutting and Sectioning: Choosing the Right Metallography Equipment for Clean Specimens
The first step is sectioning, where a representative piece is removed from the bulk material. Using a dedicated metallographic cutting machine is vital to minimize the heat-affected zone (HAZ) and mechanical deformation.
Unlike standard industrial saws, a metallography machine designed for labs uses specific cut-off wheels and a continuous flow of coolant. Whether using abrasive cutting for large parts or precision cutting for delicate components, the goal is to produce a clean surface with minimal structural damage, ensuring the subsequent steps are faster and more effective.
Mounting: Hot vs Cold Mounting Methods and When Each Is Used
Once sectioned, the specimen often needs to be "mounted" to provide a stable base for grinding. A metallography mounting press is used for hot compression mounting, utilizing thermosetting resins like phenolic or epoxy powders. This method is preferred for high-volume labs requiring excellent edge retention.
For delicate or heat-sensitive samples, cold mounting using a liquid epoxy or acrylic is the better choice. Cold mounting avoids the high pressure and temperature of a press, protecting the specimen from thermal damage. Regardless of the method, the goal of metallographic specimen preparation at this stage is to create a uniform shape that fits perfectly into the automated holders of a polisher.
Grinding and Polishing: Building a Repeatable Surface Finish for Microscopy
This is the most time-consuming part of the workflow. A metallographic grinder polisher uses a specific grinding grit sequence, starting with coarse SiC paper and moving to finer abrasives. This stage removes the surface damage from cutting and creates a perfectly flat plane.
Polishing follows grinding to remove the last remaining scratches. This is typically done using a polishing cloth charged with a diamond suspension or alumina suspension. Professionals must be careful to avoid pull-out of non-metallic inclusions or smearing of soft metals. A successful polishing stage results in a mirror-like finish, essential for clear microstructure analysis under a metallurgical microscope.
Etching and Inspection: Revealing Microstructure for Metallurgical Microscopy and Reporting
Most polished metal surfaces are highly reflective and show little detail. Metallographic etching involves applying a chemical etchant—such as Nital for steels or Keller’s reagent for aluminum—to the surface. The etchant reacts at different rates with different phases and grain boundaries, creating the contrast necessary for viewing.
Following the guidelines of ASTM E407, the sample is then inspected via optical microscopy or reflected light microscopy. At this stage, engineers can perform image analysis to document porosity, grain size, and phase distribution. This final step is the culmination of the Metallography Equipment workflow, providing the necessary data for failure analysis, materials characterization, and final reporting.
Why Torontech Is the Best Choice for Metallography Equipment and Lab Workflows
Achieving a perfect specimen requires a combination of skill and superior technology. Torontech provides a comprehensive range of Metallography Equipment designed to streamline your lab's productivity while maintaining the highest levels of precision.
From robust metallographic cutting machine solutions to high-performance metallographic grinder polisher units, our hardware is built for durability and ease of use. Partner with Torontech to ensure your metallurgical equipment delivers the repeatable, high-quality results your materials research and quality control demand.


